
Throughout this course, youve learned individual SMC concepts (order blocks, FVGs, liquidity, killzones, and more). Now its time to combine these elements into a unified framework. The synthesis of time and price analysis is what separates professional SMC traders from those who struggle.
The Time-Price Framework
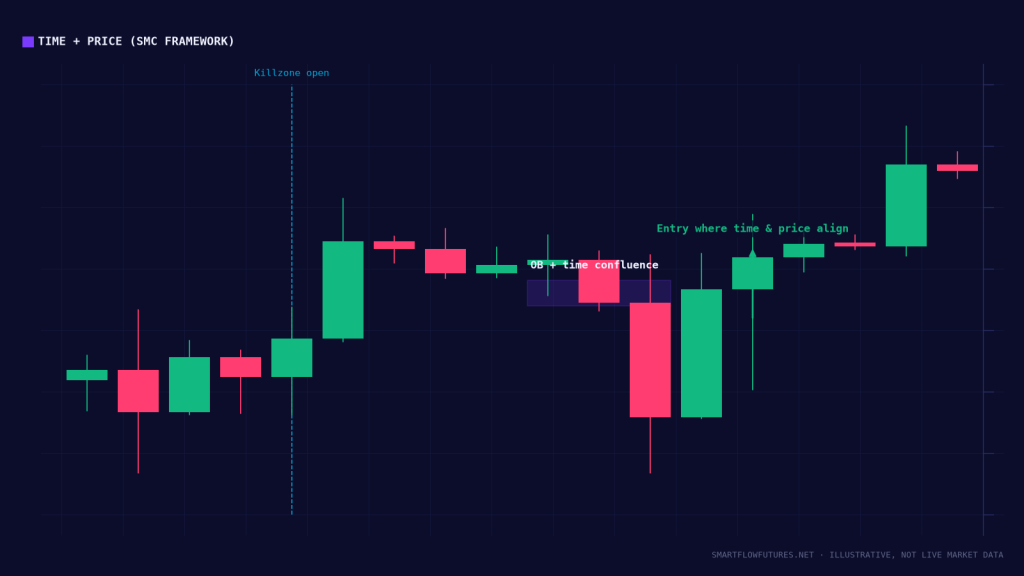
Successful SMC trading requires understanding that price moves are not random. They follow patterns tied to time. Your framework should answer two questions for every trade:
Price Question: Where do I want to enter, and why is this level significant?
Time Question: When is the optimal time to expect this level to be reached and to react?
A trade with a strong price setup but poor timing may fail. A trade timed perfectly but at the wrong level will also fail. You need both.
Building Your Analysis Process
Step 1: Establish Higher Timeframe Bias
Start with daily or 4-hour charts. Identify the current market structure (bullish or bearish). Note significant order blocks, FVGs, and liquidity pools. Determine if we are in a quarterly accumulation, manipulation, or distribution phase. This gives you directional bias.
Step 2: Identify Time Windows
What day of the week is it? (Tuesday-Thursday typically best). What session are you in or approaching? Mark killzone times on your schedule. Are there news events that could impact timing?
Step 3: Map Price Levels
Mark the Asian range (if applicable). Identify overnight highs and lows. Draw significant order blocks and FVGs. Note external liquidity targets above and below. Mark internal liquidity (FVGs) as intermediate targets.
Step 4: Wait for Confluence
The best trades occur when time and price align: price reaches a significant level (order block, FVG, liquidity) during a killzone. This confluence dramatically increases probability.
The SMC Trade Setup Checklist
Before entering any trade, confirm:
Higher Timeframe Alignment: Is your trade direction aligned with the daily/4H trend? Counter-trend trades require extra confirmation.
Time Window: Are you in a killzone? Trades during active sessions have higher probability.
Price Level: Are you at a significant SMC level? Order block, FVG, or liquidity sweep provides the entry zone.
Confirmation: What confirms your entry? BOS, CHOCH, rejection candle, or lower timeframe pattern.
Target: Where is your target? Usually the next liquidity pool or FVG.
Stop Loss: Where is the trade invalid? Beyond the setup level or structure.
Example: Complete Trade Analysis
Lets walk through a complete analysis:
Context: Wednesday during Q3. NQ has been in a weekly uptrend. We are in the distribution month of the quarter.
Higher Timeframe: 4H chart shows bullish structure with a recent BOS to the upside. A bullish order block formed after the BOS in the discount zone.
Time Analysis: Its the New York killzone (7-10 AM ET). London swept the overnight low and rallied, establishing bullish bias.
Price Analysis: Price is retracing toward the 4H bullish order block. This order block contains an FVG (confluence). The level is in the discount zone of the current range.
The Setup: Wait for price to enter the order block/FVG zone. On the 15M chart, look for a CHOCH or bullish BOS within the zone. Enter long on confirmation.
Trade Management: Stop below the order block. First target: the session high. Second target: the next swing high (external liquidity).
Time-Price Combinations That Work
Killzone + Order Block: Price reaching an order block during killzone hours is a high-probability setup.
Session Open + Liquidity Sweep: Early session sweeps of overnight levels followed by reversal.
Mid-Week + Higher Timeframe FVG: Wednesday/Thursday price filling a daily or 4H FVG often leads to strong reactions.
Quarterly Distribution + Weekly Structure: Month 3 of a quarter showing weekly BOS is a trend continuation opportunity.
What to Avoid
Good Level, Wrong Time: Price reaching an order block during Asian session (for US futures) is less significant. Wait for London or NY confirmation.
Right Time, Wrong Level: Trading during the NY killzone but entering at random prices. Wait for price to reach your predetermined levels.
Forcing Trades: Not every day has good setups. Some days, time and price dont align. Accept this and wait.
Ignoring Bigger Picture: A great 15-minute setup against the daily trend is still risky. Always consider higher timeframe context.
Building Your Personal Framework
Use this course as a foundation, but build your personal framework:
Choose Your Timeframes: What higher timeframe for bias? What trading timeframe for entries?
Select Your Killzones: Which sessions can you trade based on your schedule?
Define Your Setups: Which SMC concepts resonate with you? Order blocks? FVGs? Sweeps?
Create Your Checklist: What must be present for you to take a trade?
Backtest: Review historical charts to see how your framework would have performed.
Trade Small: Apply your framework with small size initially. Build confidence before scaling.
The Journey Forward
Youve now completed the intermediate SMC curriculum. You understand order blocks and FVGs, liquidity concepts (internal and external), inducement and liquidity sweeps, killzones and session dynamics, weekly and quarterly patterns, and how to combine time and price.
The next phase is practice and refinement. No amount of reading replaces screen time and real experience. Trade small, journal everything, and continuously improve your framework.
Key Takeaways
Successful SMC trading combines time and price analysis. Higher timeframe bias sets direction; killzones provide timing; SMC levels provide entries. The best trades have confluence: significant price levels reached during optimal time windows. Build a personal framework and checklist that fits your style. Practice, journal, and refine your approach over time.
Congratulations! You have completed the Intermediate SMC Training section. Continue to Advanced SMC concepts when ready, or begin practicing these concepts in your trading.