
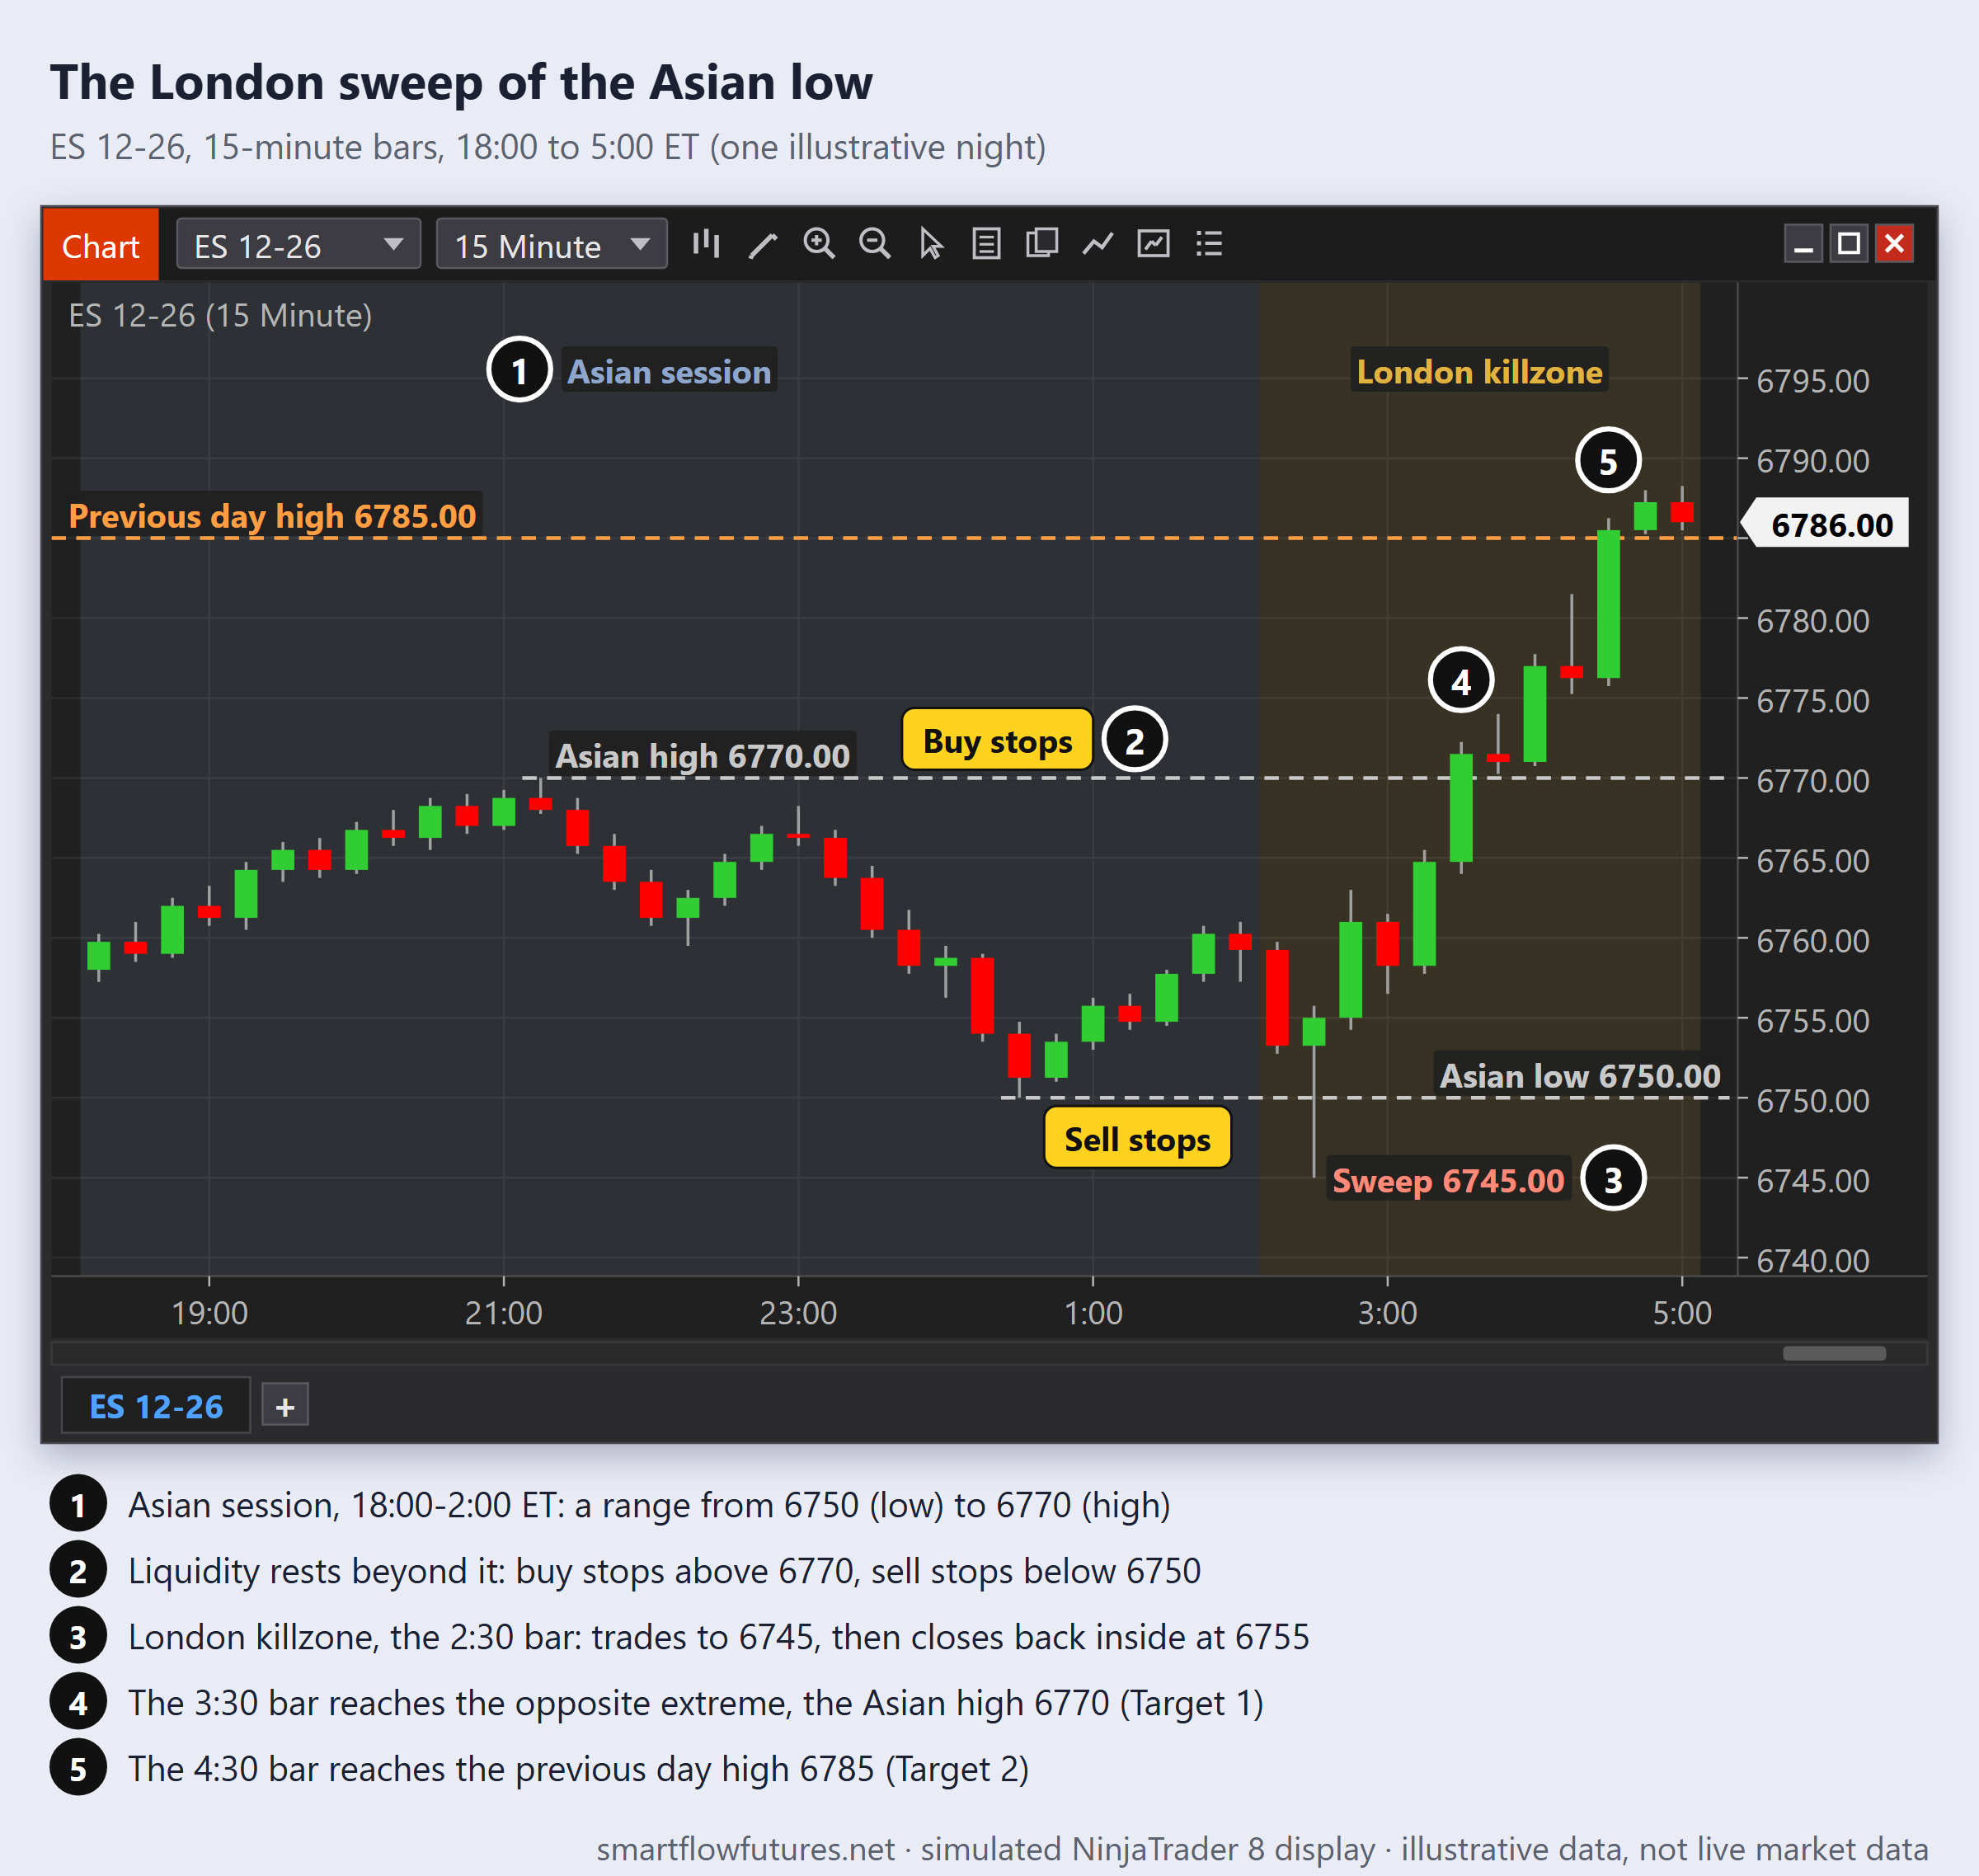
The London Sweep is a setup that occurs during the London killzone. It capitalizes on the tendency for London traders to sweep the Asian session range before establishing the real directional move for the day.
The Concept
During the Asian session, price typically consolidates into a range. Liquidity builds above the Asian high (buy stops) and below the Asian low (sell stops). In the London killzone, price often sweeps one side of this range, taking the resting stops, before moving in the opposite direction.
This creates a recurring pattern: sweep Asian high, then sell off. Or sweep Asian low, then rally. The London Sweep setup captures this reversal.
Setup Requirements
1. Clear Asian Range: A defined range during Asian session (6 PM – 2 AM ET). The range should be relatively clean with clear high and low. Very tight ranges may not provide enough liquidity.
2. London Session Timing: Setup occurs during the London killzone (2-5 AM ET). Best results in the first 1-2 hours of the London killzone (2:00-4:00 AM ET). Too late in London and the opportunity may have passed.
3. Sweep of Asian Extreme: Price must trade beyond the Asian high or low, and the 5M candle must close back inside the range. This sweep grabs the resting liquidity. The sweep should occur with some conviction but does not need to be large.
4. Rejection After Sweep: Price must show rejection after the sweep. Look for: reversal candle, lower timeframe CHOCH, or Order Flow rejection.
5. Entry on Confirmation: Enter after confirmation of reversal. Do not anticipate the rejection—wait for it to occur.
Long Setup Rules
Context: Price sweeps the Asian low during the London killzone.
Entry Trigger: After sweep of Asian low, wait for bullish confirmation. This can be: a bullish engulfing candle, a lower timeframe (1M or 5M) CHOCH, or strong buying appearing on Order Flow.
Entry: Enter long after confirmation.
Stop Loss: Below the sweep low with a small buffer (12-20 ticks, i.e. 3-5 points, on ES; 40-80 ticks, i.e. 10-20 points, on NQ).
Target: First target: Asian session high. Second target: Previous day high or next liquidity level.
Short Setup Rules
Context: Price sweeps the Asian high during the London killzone.
Entry Trigger: After sweep of Asian high, wait for bearish confirmation. This can be: a bearish engulfing candle, a lower timeframe CHOCH, or strong selling appearing on Order Flow.
Entry: Enter short after confirmation.
Stop Loss: Above the sweep high with a small buffer.
Target: First target: Asian session low. Second target: Previous day low or next liquidity level.
Order Flow Enhancement
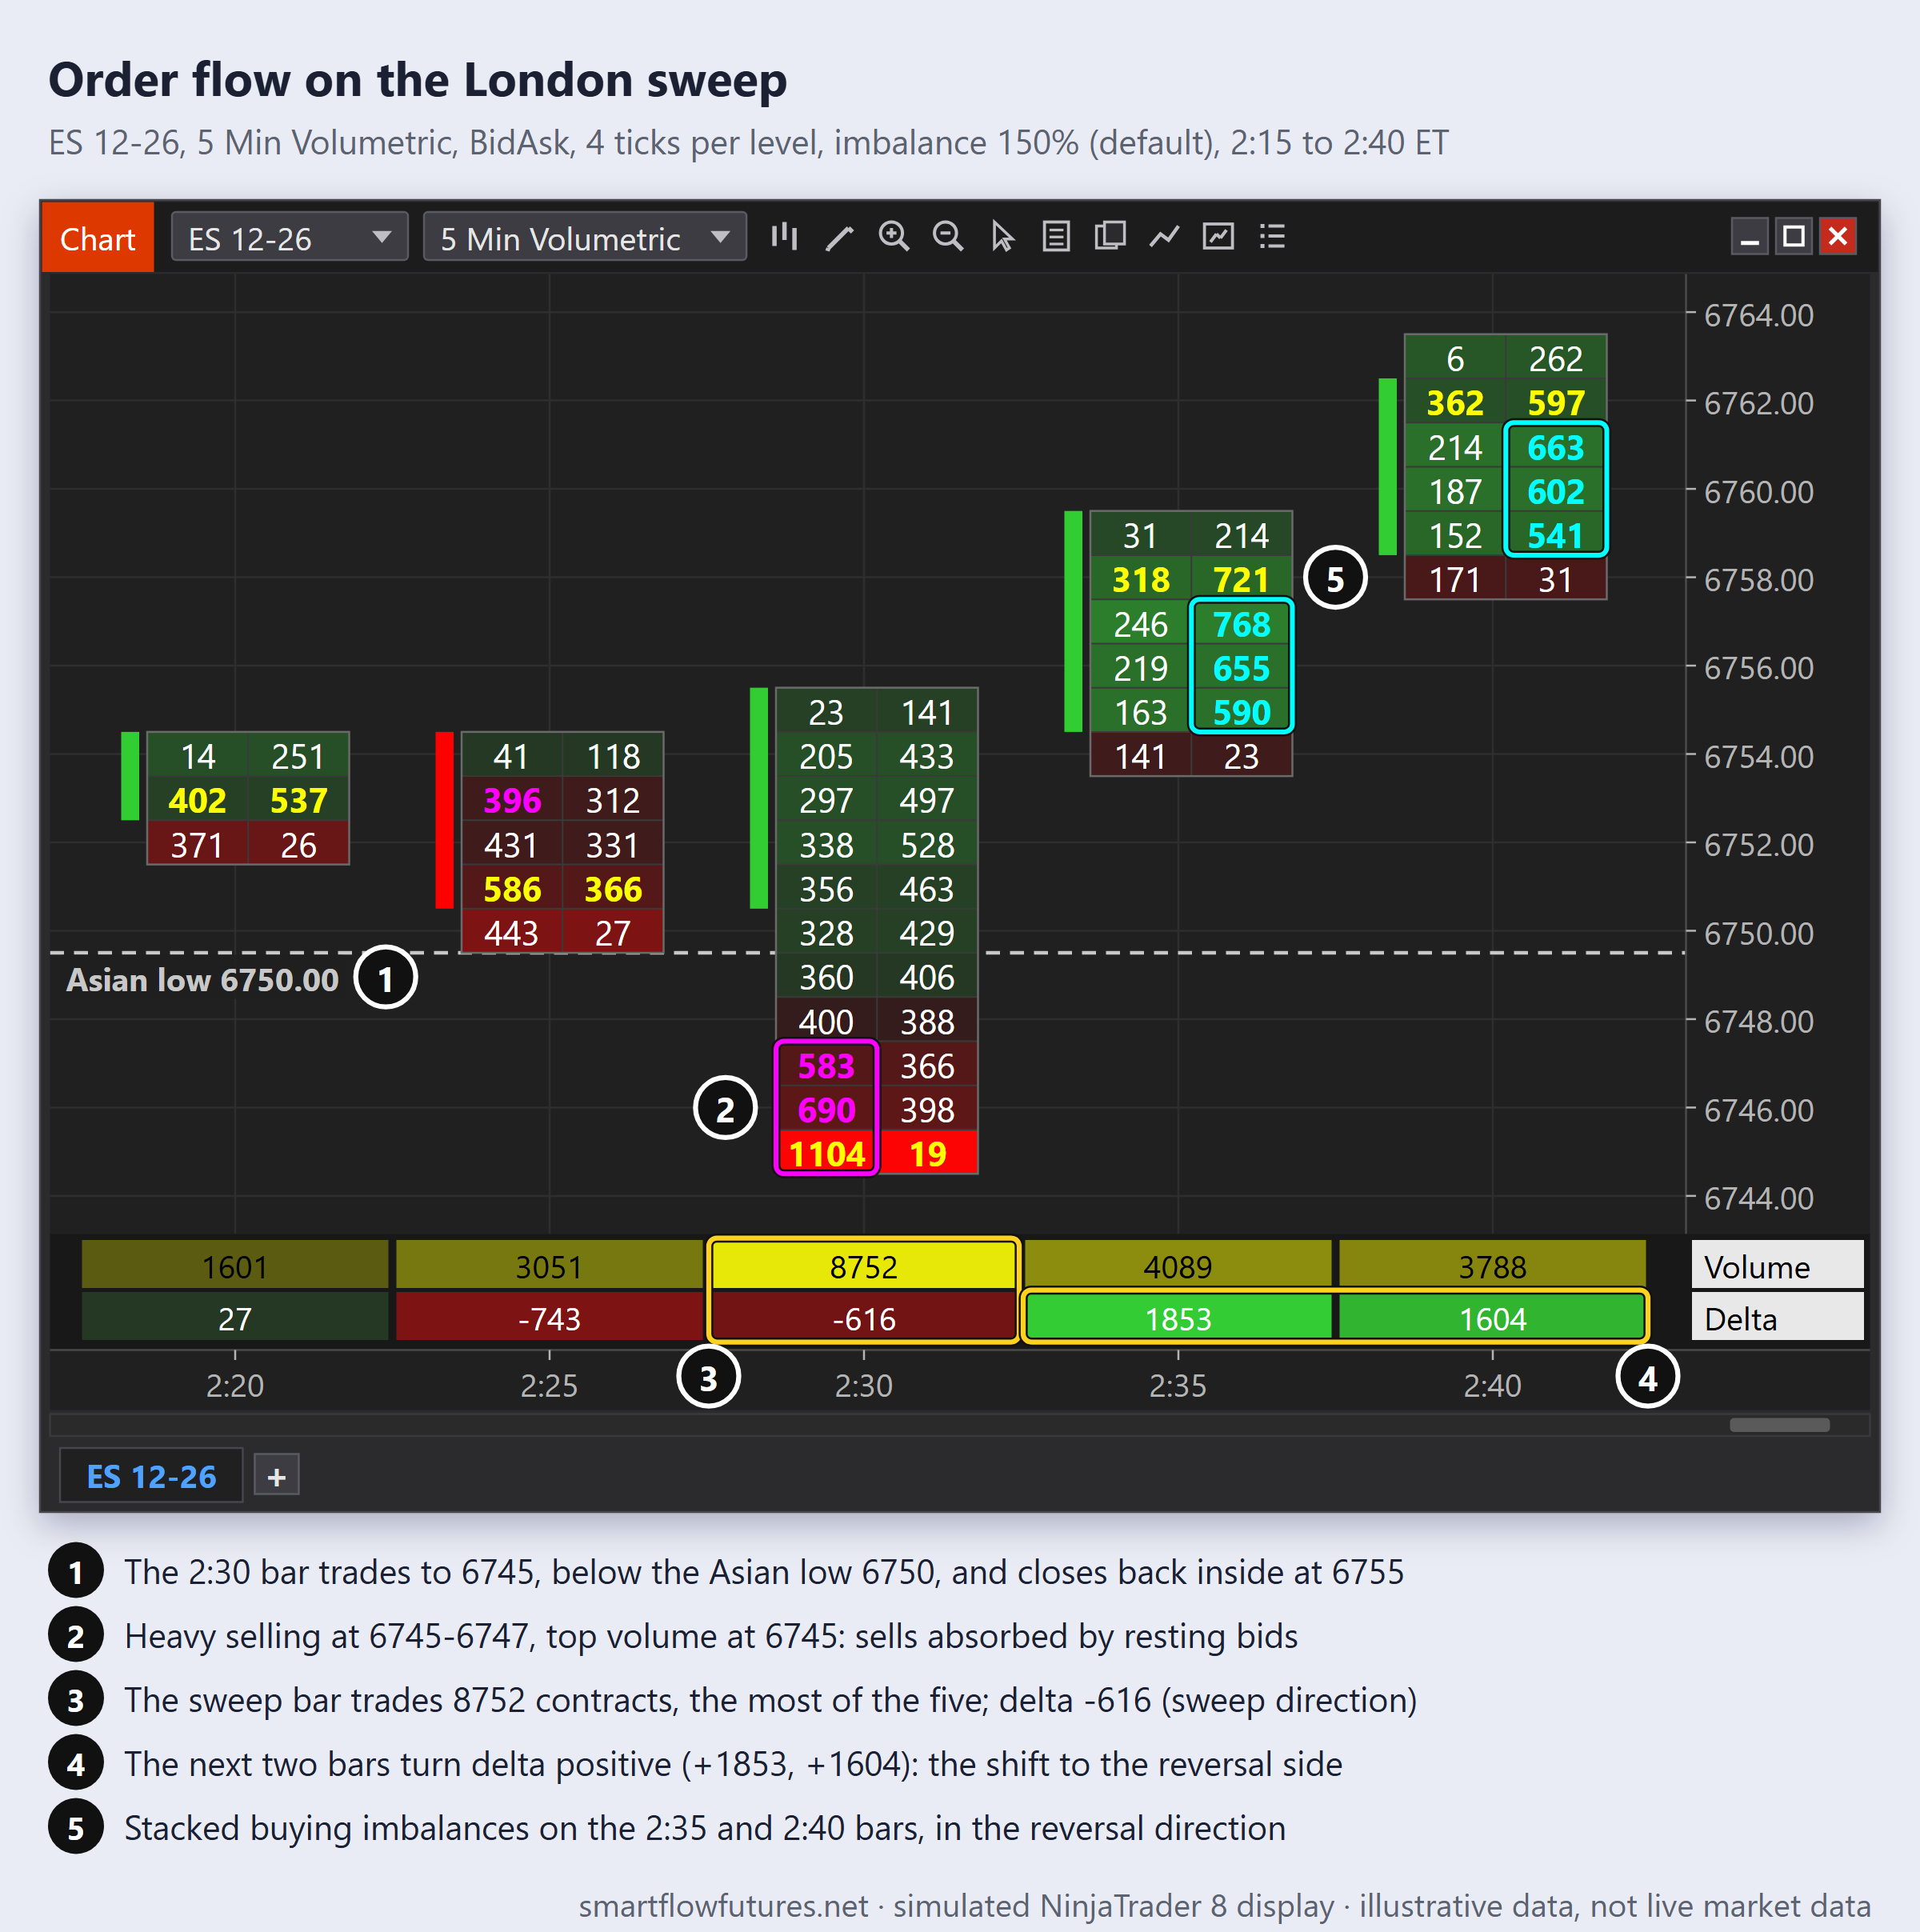
Add Order Flow for extra confirmation:
On the Sweep: Look for aggressive activity in the sweep direction (consistent with stops being triggered). The sweep should show volume and momentum.
On the Rejection: Look for absorption at the extreme. Stacked imbalances in the reversal direction. Delta shift from sweep direction to reversal direction.
Order Flow confirmation strengthens the setup.
Example Trade Walkthrough
Setup:
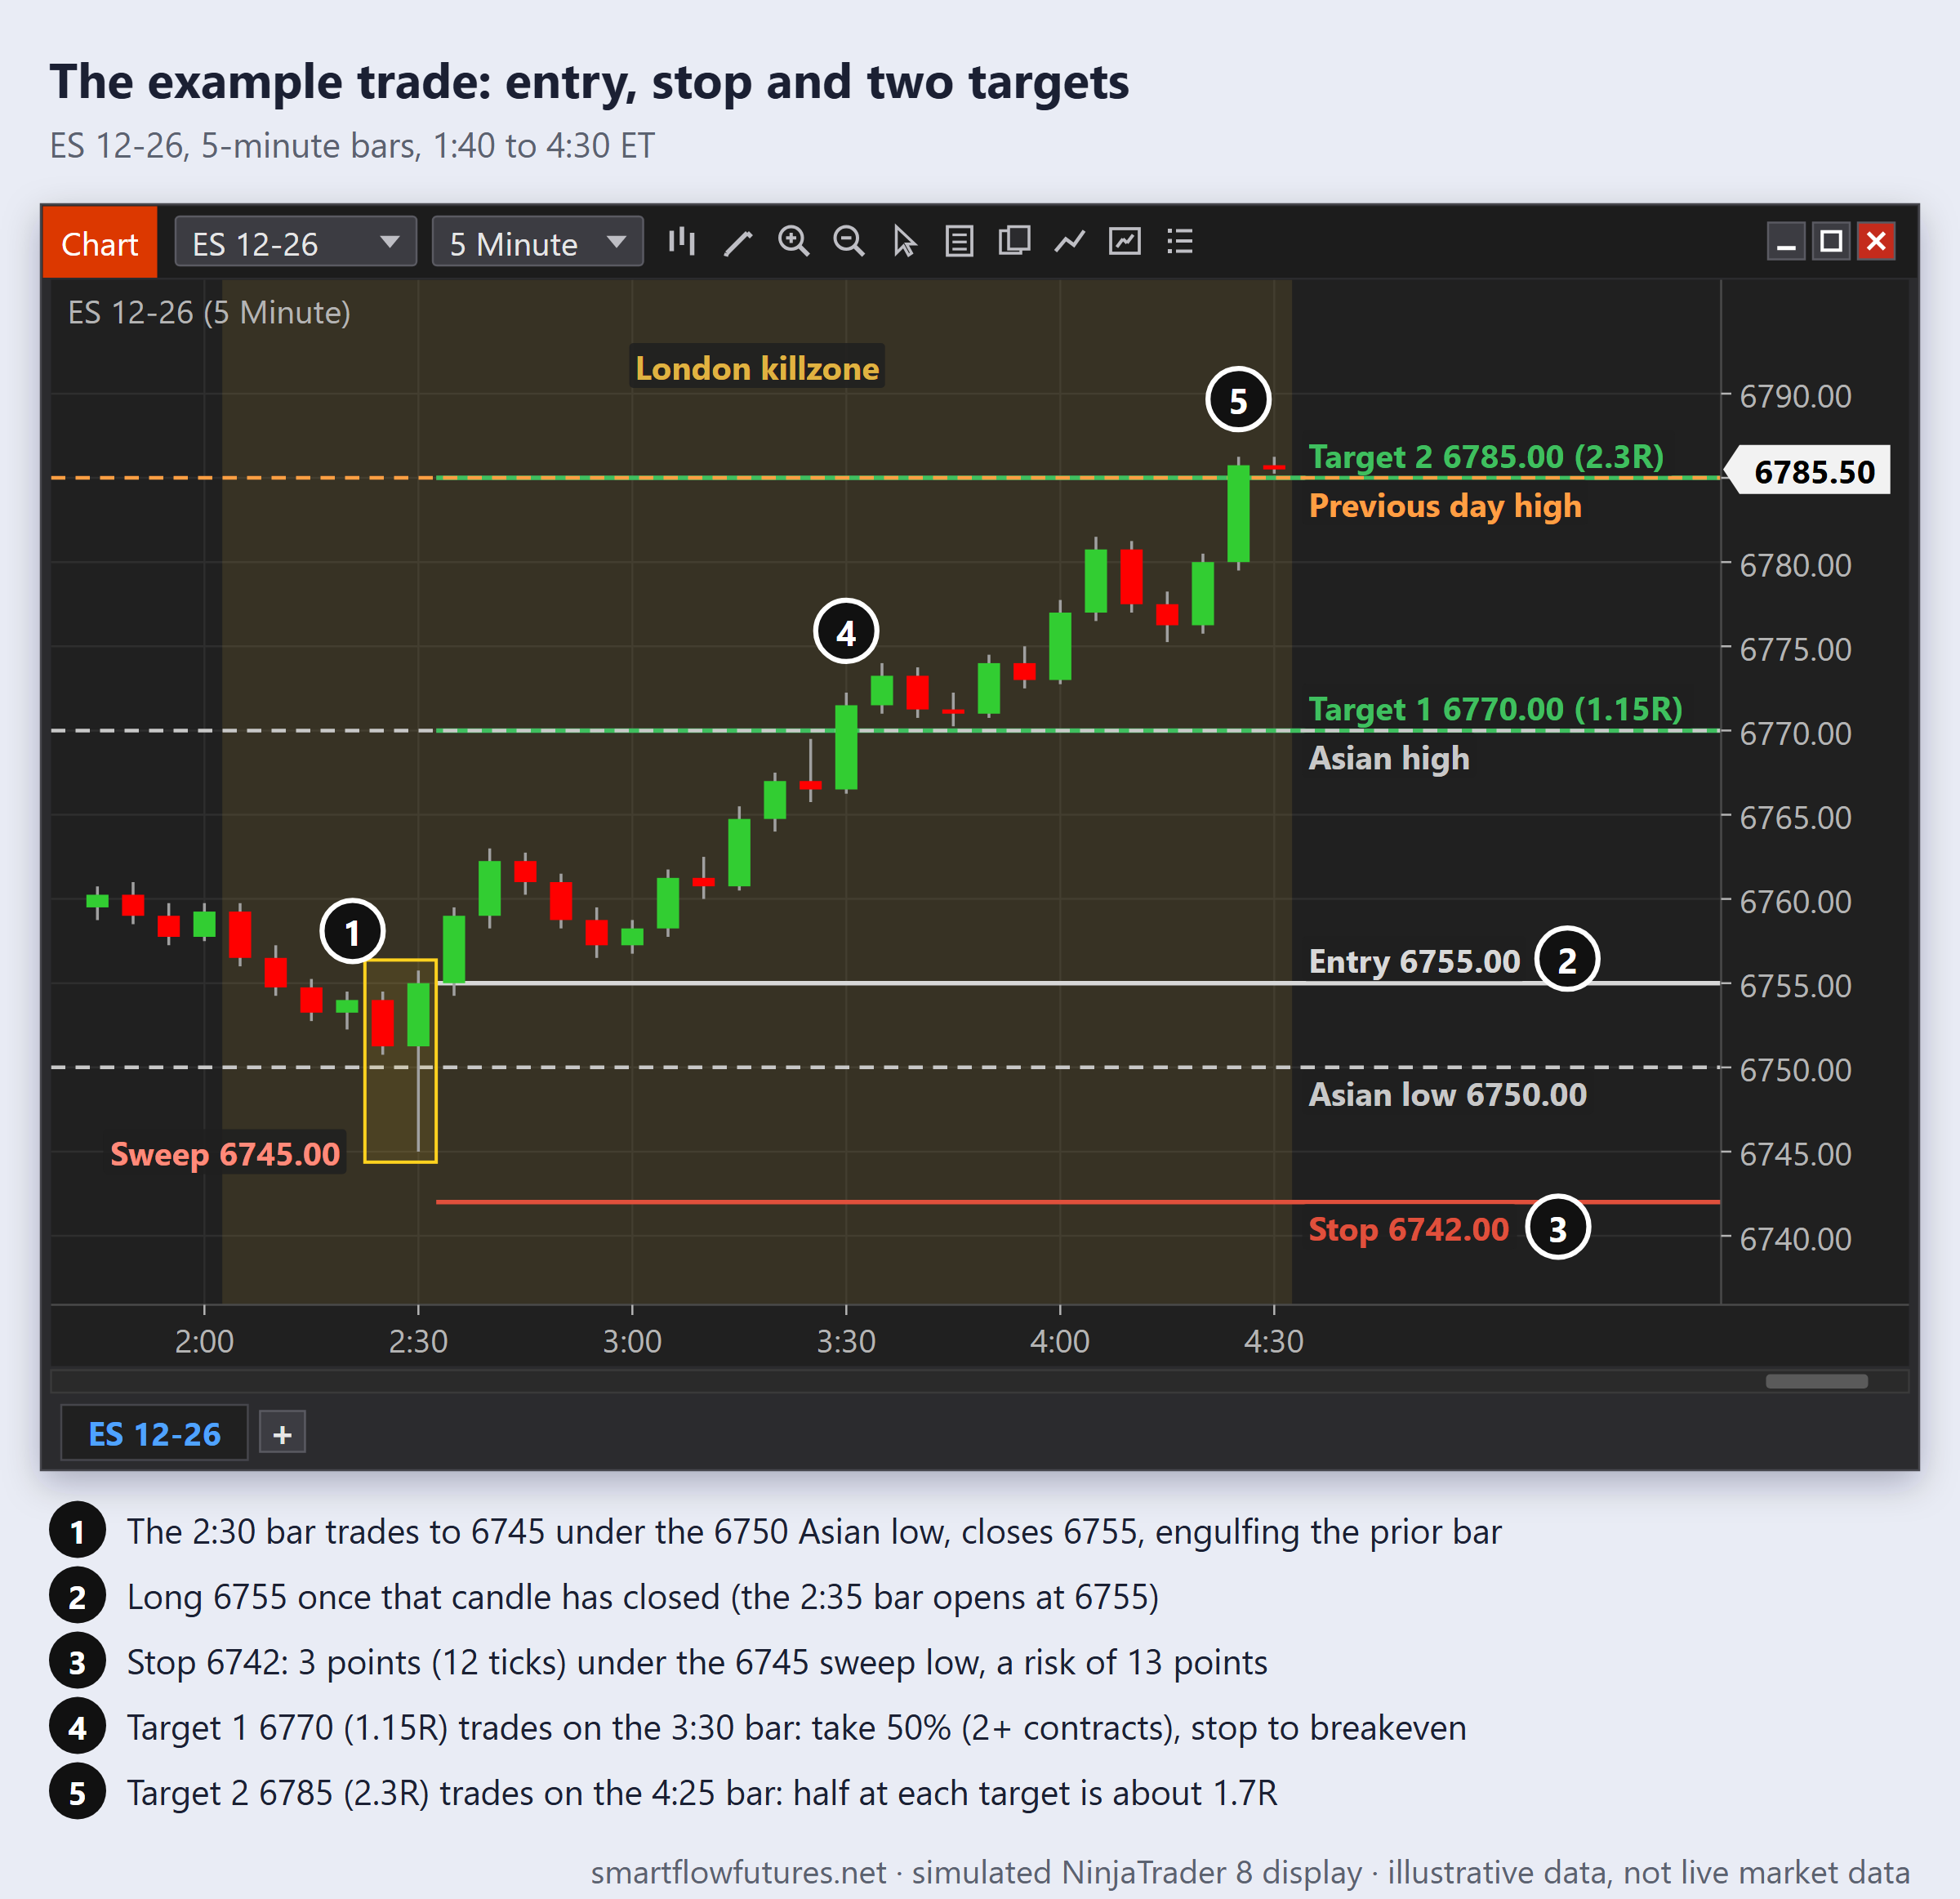
Asian session (6 PM – 2 AM ET) formed a range from 6750 to 6770 on ES.
At 2:30 AM ET (London killzone), price drops sharply to 6745, sweeping the Asian low at 6750.
The 5M candle that traded down to 6745 closed back inside the range at 6755, a strong bullish engulfing of the prior candle.
Footprint shows the selling at 6745 absorbed on that candle, then stacked buying imbalances on the candles that follow.
Execution:
Enter long at 6755 (once the engulfing candle has closed).
Stop at 6742 (below the 6745 sweep low with a 3-point, 12-tick buffer).
Target 1 at 6770 (Asian high).
Target 2 at 6785 (previous day high).
Management:
Take 50% at Target 1 (this needs at least 2 contracts).
Move stop to breakeven.
Let remainder run toward Target 2.
When to Avoid
Very Wide Asian Range: If the range is unusually large, the move beyond it may be a genuine breakout rather than a liquidity grab.
Strong Trend Context: If higher timeframe is strongly trending in sweep direction, the move beyond the level may be continuation rather than reversal.
Major News Pending: If significant news is due during London session, patterns may not play out normally.
No Clear Sweep: If price just drifts through the Asian level without conviction, or a 5M candle closes beyond it (a break), there is no sweep and no setup.
Statistics and Expectations
The R:R depends on your entry, stop and targets; compute it for each trade.
In the example, the risk is 13 points (entry 6755, stop 6742). Target 1 (the Asian high) pays 1.15R (15 / 13 points) and Target 2 (the previous day high) 2.3R (30 / 13). The managed trade (half at each target) returns about 1.7R, or about 0.6R if the remainder is stopped at breakeven.
Track your own statistics as you trade the setup.
Key Takeaways
The London Sweep capitalizes on European session sweeping Asian range liquidity. Wait for the sweep of Asian high or low during the London killzone (2-5 AM ET). Require confirmation of reversal before entering. Stop goes beyond the sweep with buffer; target is opposite range extreme and beyond. Order Flow confirmation (absorption, stacked imbalances) strengthens the setup. Avoid when Asian range is too wide or strong trend favors sweep direction.