
Risk Management for Self-Funded Traders
Introduction
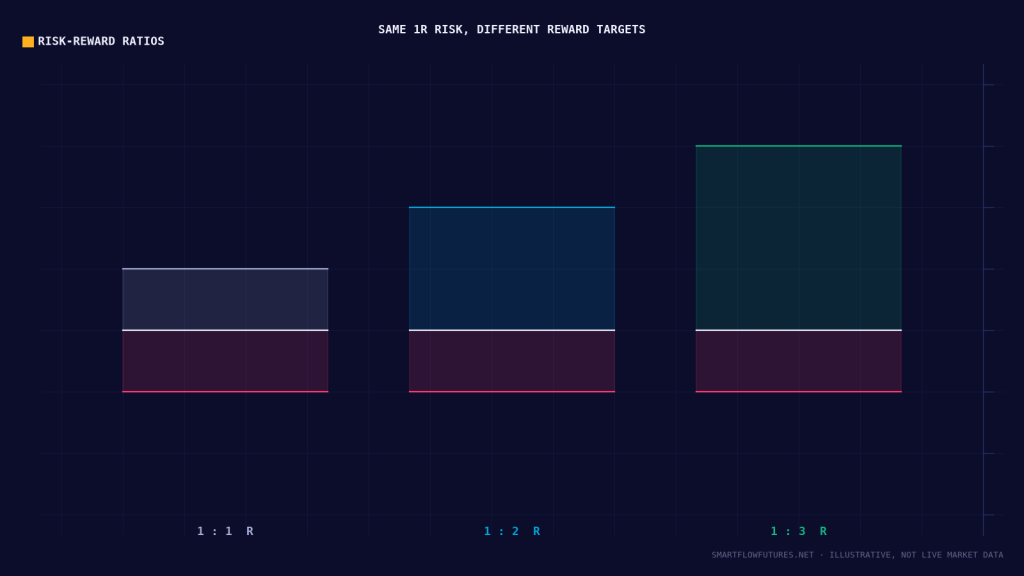
When you trade with your own money, risk management is everything. Without external rules to protect you, without a prop firm’s drawdown limits to stop you, the only thing standing between you and account destruction is your own risk management discipline.
This article provides a complete framework for managing risk as a self-funded futures trader. You will learn how to size positions properly, set appropriate limits, and build the habits that keep you in the game long enough to succeed.
Why Risk Management is Non-Negotiable
Before diving into specifics, let us establish why risk management deserves this much attention.
The Mathematics of Loss
Losses and gains are not symmetrical. Recovering from losses requires disproportionately larger gains:
| Loss | Gain Needed to Recover |
|---|---|
| 10% | 11.1% |
| 20% | 25% |
| 30% | 42.9% |
| 40% | 66.7% |
| 50% | 100% |
| 60% | 150% |
| 70% | 233% |
| 80% | 400% |
A 50% drawdown requires doubling your account just to break even. This is why preventing large drawdowns is more important than maximizing gains.
The Risk of Ruin
Risk of ruin is the probability that you will lose enough capital to be unable to continue trading. Even profitable strategies can lead to ruin if position sizing is too aggressive.
Example: A trader with 60% win rate and 1:1 risk-reward has a positive edge. But if they risk 25% per trade, they have a significant probability of ruin despite being “profitable” in expectation.
The same trader risking 2% per trade has near-zero risk of ruin.
Survival First, Profits Second
Your primary job as a trader is to survive. You cannot profit if you have no capital. Every risk management decision should prioritize account preservation over profit maximization.
The Core Risk Management Rules
These are the fundamental rules every self-funded trader must follow.
Rule 1: Maximum Risk Per Trade (1-2%)
The rule: Never risk more than 1-2% of your total account equity on any single trade.
Why: This ensures that no single trade can significantly damage your account. With 1% risk, you would need 100 consecutive losses to lose your entire account, which is statistically nearly impossible with any reasonable strategy.
How to apply:
Risk Amount = Account Size × Risk Percentage
Example:
 $25,000 account × 1% = $250 maximum risk per trade
Position sizing formula:
Position Size = Risk Amount ÷ (Stop Distance × Tick Value)
Example (ES):
 $250 risk ÷ (8 points × $50/point) = $250 ÷ $400 = 0.625 contracts

Since you cannot trade partial contracts, you would trade 0 ES contracts
 (risk too high) or find a trade with a tighter stop, or use MES instead.

With MES ($5/point):
 $250 ÷ (8 points × $5/point) = $250 ÷ $40 = 6.25 contracts
 Trade 6 MES contracts.
Recommended risk levels:
- Conservative: 0.5% per trade
- Standard: 1% per trade
- Aggressive: 2% per trade (maximum recommended)
Rule 2: Maximum Daily Loss Limit (3-5%)
The rule: Stop trading for the day when you have lost 3-5% of your account equity.
Why: Bad days happen to every trader. A daily loss limit prevents a bad day from becoming a catastrophic day. It also interrupts emotional spirals that lead to revenge trading.
How to apply:
Daily Loss Limit = Account Size × Daily Loss Percentage
Example:
 $25,000 account × 3% = $750 daily loss limit
When you hit this limit:
- 1. Close all positions
- 2. Turn off your trading platform
- 3. Do not trade again until the next session
- 4. Review what went wrong before trading again
Rule 3: Maximum Weekly Loss Limit (6-10%)
The rule: Stop trading for the week when cumulative weekly losses reach 6-10%.
Why: Multiple bad days in a row signal that something is wrong, whether with your strategy, your execution, or market conditions. Taking time off allows you to reset.
How to apply:
Weekly Loss Limit = Account Size × Weekly Loss Percentage
Example:
 $25,000 account × 6% = $1,500 weekly loss limit
When you hit this limit:
- 1. Stop trading for the remainder of the week
- 2. Conduct a thorough review of all trades
- 3. Identify any patterns or issues
- 4. Consider whether strategy adjustments are needed
- 5. Resume next week with reduced size if concerns remain
Rule 4: Maximum Drawdown Circuit Breaker (15-20%)
The rule: If your account drops 15-20% from its peak, stop live trading entirely and return to demo.
Why: This is your emergency stop. A drawdown this large indicates a serious problem that live trading will not fix. You need to diagnose and solve the problem before risking more capital.
How to apply:
Track your account’s peak value. If current equity drops 15-20% below that peak, implement the circuit breaker:
- 1. Close all positions
- 2. Stop live trading immediately
- 3. Return to demo trading
- 4. Analyze what went wrong thoroughly
- 5. Only return to live trading after demonstrating recovery in demo
Position Sizing in Detail
Position sizing determines how many contracts to trade on each position. This is where theory becomes practice.
The Fixed Fractional Method
The most common approach: risk a fixed percentage of your account on each trade.
Formula:
Number of Contracts = (Account × Risk %) ÷ (Stop Points × Point Value)
Worked example with ES:
- Account size: $50,000
- Risk per trade: 1% ($500)
- Stop loss: 10 points
- ES point value: $50
Contracts = $500 ÷ (10 × $50) = $500 ÷ $500 = 1 contract
Worked example with MES:
- Account size: $10,000
- Risk per trade: 1% ($100)
- Stop loss: 10 points
- MES point value: $5
Contracts = $100 ÷ (10 × $5) = $100 ÷ $50 = 2 contracts
Adjusting for Volatility
When markets are more volatile, consider:
- Using wider stops (which means fewer contracts)
- Reducing risk percentage
- Trading smaller contracts (Micro instead of E-mini)
When markets are calm:
- Normal position sizing applies
- Do not increase risk just because volatility is low. It can spike suddenly
The Position Sizing Table
Create a reference table for quick position sizing:
Example for $25,000 account, 1% risk ($250):
| Contract | 5pt Stop | 8pt Stop | 10pt Stop | 15pt Stop |
|---|---|---|---|---|
| ES ($50/pt) | 1 | 0 | 0 | 0* |
| MES ($5/pt) | 10 | 6 | 5 | 3 |
| NQ ($20/pt) | 2 | 1 | 1 | 0* |
| MNQ ($2/pt) | 25 | 15 | 12 | 8 |
*0 = Risk exceeds 1% with even one contract; use smaller contract or wider stop
Setting Stop Losses
Every trade must have a stop loss. No exceptions.
Where to Place Stops
Stop losses should be placed at technically meaningful levels, not arbitrary distances:
For SMC traders:
- Below swing lows (for longs)
- Above swing highs (for shorts)
- Beyond order blocks or fair value gaps
- At points where your trade thesis is invalidated
Wrong approaches:
- Fixed pip/point stops regardless of structure
- Stops so tight they get hit by normal noise
- Stops so wide they exceed your risk parameters
Stop Loss Types
Hard stop (bracket order): A stop order placed immediately when you enter the trade. This is the safest approach. Your stop is in the market regardless of what happens.
Mental stop: You plan to exit at a certain level but do not place the order. This is dangerous for most traders. When price hits your “mental stop,” emotions often convince you to hold.
Time stop: Exit the trade if it has not worked within a certain time. Useful for day trades that should move quickly if they are going to work.
Recommendation: Always use hard stops. Mental stops require exceptional discipline that most traders lack.
Never Move Your Stop Further Away
One of the most destructive habits in trading is moving your stop loss further from your entry to avoid being stopped out.
Why traders do it: The trade is going against them, they do not want to take the loss, and moving the stop gives the trade “more room.”
Why it destroys accounts: You are no longer risking what you planned to risk. A 1% risk trade becomes a 3% risk trade. Compounded over time, this behavior leads to catastrophic losses.
The rule: Stops can only be moved to reduce risk (moved toward breakeven or in the direction of profit), never to increase risk.
Managing Open Positions
Risk management does not end once you enter a trade.
Scaling Out
Some traders exit positions in stages rather than all at once:
Example:
- Exit 50% at 1:1 risk-reward
- Exit remaining 50% at 2:1 risk-reward
Pros: Locks in some profit, reduces emotional pressure
Cons: Reduces average profit on winning trades
Moving Stops to Breakeven
Once a trade moves in your favor by a certain amount (often 1R or your initial risk amount), you can move your stop to breakeven.
Pros: Eliminates risk of loss on the trade
Cons: Can get stopped out on normal retracements before the trade works
Balanced approach: Move to breakeven only after price has confirmed the move (new structure formed, significant distance achieved).
Trailing Stops
A trailing stop moves with price to lock in profits as the trade continues in your favor.
Methods:
- Fixed distance trailing (stop always X points behind price)
- Structure-based trailing (stop moves to each new swing low/high)
- ATR-based trailing (stop at N × ATR behind price)
Caution: Trailing too tight gets you stopped out of good trades. Trailing too loose gives back too much profit. There is no perfect setting. This requires testing and personal preference.
Correlation and Exposure Risk
When trading multiple positions, consider your total exposure.
Correlated Markets
Index futures (ES, NQ, YM) are highly correlated. If you are long ES and long NQ, you essentially have double the exposure to “the stock market going up.”
Example of hidden overexposure:
- Long 2 ES contracts (risking 1%)
- Long 3 NQ contracts (risking 1%)
- Both positions are essentially the same bet
- True risk if both stop out together: 2%
Managing Correlation
Option 1: Trade only one correlated market at a time
Option 2: Reduce position sizes when trading correlated markets
Option 3: Take opposing positions in correlated markets (hedging)
Recommendation: For most self-funded traders, option 1 is simplest. Focus on one market at a time until your account grows substantially.
Portfolio Heat
“Heat” refers to your total open risk at any moment.
Maximum recommended portfolio heat: 5-6% of account
Example:
- Trade 1: 1% risk (open)
- Trade 2: 1% risk (open)
- Trade 3: 1% risk (open)
- Total heat: 3% ✓ (acceptable)
If you have 6 trades open at 1% each, your total exposure is 6%. One bad move across correlated markets could hit your daily loss limit instantly.
Psychological Risk Management
Technical risk management is only half the battle. You must also manage psychological risks.
Revenge Trading
What it is: Taking impulsive trades to “make back” recent losses
How to prevent it:
- Hard daily loss limits that force you to stop
- Physical separation from your trading platform after losses
- Written rule: “No new trades for 30 minutes after a loss”
Overconfidence After Wins
What it is: Increasing risk or taking marginal setups after a winning streak
How to prevent it:
- Fixed position sizing regardless of recent results
- Same trade criteria win or lose
- Written rule: “No size increases within the same day/week”
Fear After Losses
What it is: Hesitating to take valid setups because recent losses created fear
How to prevent it:
- Trust in your proven system (this is why demo testing matters)
- Focus on process, not recent outcomes
- Reduce size temporarily if needed to rebuild confidence
Trading to Meet Goals
What it is: Taking excessive risk because you “need” to make a certain amount
How to prevent it:
- Never trade with money you need for living expenses
- No daily profit targets (only daily loss limits)
- Accept that some days/weeks/months will be negative
Building Your Risk Management Protocol
Create a written document with your specific rules. Here is a template:
My Risk Management Protocol
Account Information:
- Account size: $______
- Markets traded: ______
Per-Trade Rules:
- Maximum risk per trade: ___% ($_____)
- Stop loss: Always placed before entry
- Stop loss movement: Only toward profit, never away
Daily Rules:
- Maximum daily loss: ___% ($_____)
- Maximum trades per day: _____
- Action at daily loss limit: Stop trading, review, resume tomorrow
Weekly Rules:
- Maximum weekly loss: ___% ($_____)
- Action at weekly limit: Stop trading, full review, resume next week
Circuit Breaker:
- Maximum drawdown: ___% ($_____)
- Action at circuit breaker: Return to demo until issue resolved
Position Sizing:
- Method: Fixed fractional (___%)
- Maximum portfolio heat: ___%
- Correlated market policy: _____
Sign and date this document. Review it weekly.
Common Mistakes to Avoid
Not having written rules: Rules in your head are easy to ignore. Write them down.
Making exceptions: “Just this once” leads to habitual rule-breaking.
Changing rules after losses: Stick with your rules through drawdowns. Change rules only during calm, analytical periods.
Not tracking: You cannot manage what you do not measure. Track every trade.
Risking money you need: Scared money makes scared decisions.
Ignoring correlation: Multiple correlated positions multiply your risk.
🔑 Summary and Key Takeaways
- Losses require disproportionately larger gains to recover, so prevention beats recovery
- Risk 1-2% maximum per trade to ensure no single trade can destroy you
- Set daily (3-5%), weekly (6-10%), and maximum (15-20%) drawdown limits
- Always use hard stops; mental stops fail under pressure
- Never move stops further away from entry
- Manage correlation: multiple index positions multiply your exposure
- Psychological risk management is as important as technical risk management
- Write down your rules and follow them without exception
- Survival is the priority: you cannot profit if you have no capital
⚠️ Risk Warning and Disclaimer
Futures trading involves substantial risk of loss. Proper risk management reduces but does not eliminate this risk.
The guidelines in this article are educational recommendations, not guarantees of success. Your personal circumstances may require different parameters.
This article is for educational purposes only and does not constitute financial advice. Consider consulting with a financial professional about risk management appropriate for your situation.